Whether you are a seasoned professional or a novice eyelash applicator, it’s great to review how to put on false eyelashes to ensure you’re doing it correctly and getting the best use of your falsies possible. Put them on incorrectly and you could experience discomfort and even the oh-so-embarrassing “loss of lash” disaster when one or both of your fake lash bands detaches from your eyelid and goes who knows where. When appropriately applied, false eyelashes are a great way to create dramatic, beautiful individual lashes without spending a lot of time at a salon. False eyelashes offer you the flexibility of having gorgeous, full-length lashes without committing to a particular style or risking the side effects of scary lash-lengthening serums or gels. Using false lashes at home also saves you time; there are no more two-hour applications at your “lash lady’s” studio.
While some people may shy away from false eyelashes, it’s usually just because they have preconceived notions about them from past experiences. False eyelashes were once a one-size-fits-most product. In other words, the lengths and styles were all very similar, the bands felt bulky and uncomfortable, and the glue just simply didn’t work. The glue once used for false eyelashes was known to irritate delicate eyelid skin, and leave the user feeling less than glamorous. If you’re coming from a background of fake eyelash woes like these, take heart! We’ve got your step by step instruction manual for perfectly applying your false lashes to be worn and re-worn comfortably and beautifully. Cue your inner makeup artist- Here’s how to put on false eyelashes, even if you’ve never tried it previously.
Select your style
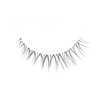
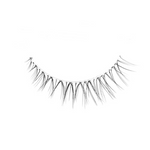
The first step in applying false eyelashes is selecting the style. Today’s false eyelashes are available in a myriad of lengths, thicknesses and colors. From lengthy, dramatic, glam-appropriate looks, to more understated, business beautiful, you can find a pair of lashes that perfectly match your style, mood, or the occasion. By selecting the correct style, you shouldn’t feel the need to trim the lashes down to make them more work appropriate or wish they had more length or volume for a night out. Pro tip: It’s a great idea to have several different styles on hand so you’re never in a pinch to create the lash effect you want.
Prep your face
Your lash application should come after you’ve applied your makeup, so the first step is to start with a clean face. Make sure you gently cleanse your lashes and lash line with a cotton swab so that any oils from your skin have been removed. Next, apply your makeup like you normally would. This includes your eye makeup. You can even apply your favorite eyeliner, just be sure not to apply mascara. This can stiffen your natural lashes and make them more difficult to blend with the false lashes.
Curl your natural lashes
At this point, you should curl your natural lashes. Curling your natural lashes will help them blend better with the false lashes. Most all styles of false lashes are curved, so adding a slight curl to your natural lashes helps them blend in with the fibers of the false lashes creating a more beautiful, natural look. You can curl your lashes with a standard lash curler- Pro tip: For added volume, you can heat the curler with a blow-dryer for a few seconds before applying it to your lashes, just be careful to test the curler with your finger to make sure you didn’t overdo it and heat the curler to a temperature that is too hot.
Remove lashes from packaging
You are now ready to remove your false lashes from their packaging. This is a really important step that seems fool-proof, but can get tricky if not done correctly. Removing the strip lashes from their protective packaging should be done carefully and slowly. It’s a good idea to use the “pinch” technique. Carefully pinching the side edge of one of the lash bands, gently pull it straight out from the protective packaging. Pinch another edge and do the same, until the lash comes off completely. This way, the shape of the lash remains intact. Pulling the lash quickly from the package from one side to the other can damage the lash band or flatten the band's curvature.
Size your lashes
Now that you’ve removed your eyelash strips from their protective packaging, it’s time to size them. Your lashes came in a size that is likely to long for your eye shape, so they will need to be trimmed down. You can determine how much to trim by gently placing them on your lash line and gauging how much the band hangs off the outside corner of your eye. Once you’ve measured, carefully trim off a small portion of the lashes and band. Pro-tip: It’s a good idea to always cut less than you think you need to. You can always go back and cut more off, but you can’t put back on the part you cut!
Apply lash glue onto the lash
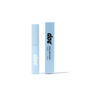
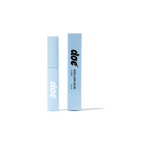
If you are using a lash applicator tool, which we highly recommend, you’ll want to position the lash on the tool in the same fashion you plan to apply it to your lash line. Some people prefer to use an eyelash curler before, after, or both! To start, while holding the lash band in your applicator tool, apply the eyelash glue to the lash band. Lash glue is now available in colors, which is a great way to help the lashes blend to your eyeliner and natural lash color. Squeeze a small amount of glue from the tube onto the lash band, and gently drag it across the band. Be sure the outer and inner corners of the lash band are completely coated with glue. Once you have applied the glue, allow fifteen to twenty seconds for it to partially dry. The glue will feel tacky, but not wet. If you attempt to apply the glue before letting it partially dry, the lash band could slide around, getting glue all over your eyeshadow and makeup causing the lash to not adhere properly.
Apply lashes with application tools
Again, using a lash application tool is going to save you a lot of misery when applying your lashes. Using the tool, and a mirror angled downward, look down and gently press the lash band onto your lid, as close to your natural lash line as possible. Start by gently pressing in the center of the lash band, and working outward, press the false lashes onto your lash line. Using the application tool, press the inner and outer corners of the lashes into place. The entire band of false lashes should now be pressed firmly onto your natural lash line, as close to it as possible.
Press lashes together to blend
Using your application tool, gently press together your natural lashes and the false lashes to blend them. If you aren’t using a lash application tool, use your fingers or a pair of blunt tweezers to do this, but be careful of using anything sharp that could crimp, clip, or damage the false lashes or your natural lashes. Your lashes should now feel comfortable and weightless on your eyelids. If any portion of the lash band appears to be loose or feels uncomfortable, try dabbing a small portion of lash glue to an applicator tool and gently pressing it to the trouble spot. This should provide enough additional adhesive to keep it attached.
Finish the look. You’re done! Your lashes should be in place and look and feel amazing. If they don’t, you’re likely not wearing a great pair of quality lashes. You can determine if your lashes are high quality by examining the fibers from which they are made. Korean silk lashes are a great option when considering which false lash brands are quality or not. Korean silk feels soft and natural like your own lashes.
Additionally, you should ensure the lash band (the portion that attaches to your lash line) is made from a material that won’t hurt sensitive eyelid skin or feel heavy or uncomfortable. Great lash bands are made with cotton and have a feather-light feel. They should never feel heavy, droopy, or itchy. If any of those things are true, you could be experiencing an allergic reaction. To finish the look, you can apply eyeliner. It is not recommended (or even remotely necessary) to apply mascara to your false lashes. It simply isn’t needed.
Applying false eyelashes should be a simple process that you can do in about two minutes each time you want to wear them. Don’t get frustrated if you can’t get them applied perfectly the first time you try. It takes practice, great products, and the help of an applicator tool. If you follow the steps above, applying your false eyelashes can become routine. You won’t even have to think about what you’re doing; it will come naturally. Being comfortable applying and wearing false eyelashes is a great tool for anyone who wants to enhance their natural lash line on a daily or even part time basis.
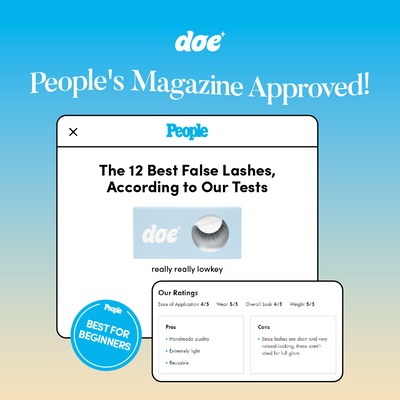
Check out Doe Lashes for the lashes that provide cloud-like comfort and can be worn everyday.
